Installing Hexamail Nexus
-
This section talks you through initial installation of the Hexamail Nexus product.
- 1) Checking your machine
-
The first thing to do is ensure that you have a suitable machine on which to install Hexamail Nexus
The machine should have sufficient disk space, RAM and a suitable processor, as per the minimum requirements below:
Operating System CPU RAM Disk Other Windows Server 2016, 2012, 2008, 2003, SBS, SBS 2008, Windows 10, NT 4.0, 2000, XP, Vista 1000MHz+ 1000MB 1GB Microsoft Exchange Server 2016, 2010, 2003, 2000, 5.5, 5.0, or 4.0 Lotus Notes, Lotus Domino, SLMail, NT Mail, QMail, Netscape Mail Server, MailDaemon, LSTMP, iMail, PostOffice, Sendmail, or MailSite Email Server. Or any other SMTP or ESMTP enabled MTA or Mail Server LINUX 1000MHz+ 640MB 1GB Lotus Notes, Lotus Domino, SLMail, QMail, Netscape Mail Server, MailDaemon, LSTMP, iMail, PostOffice, Sendmail, or MailSite Email Server. Or any other SMTP or ESMTP enabled MTA or Mail Server
- 2) Running the installer
-
Once you have downloaded the installer, simply double click the installer executable hexamailnexusSetup.exe to run it.
- 3) Follow the setup screens
-
First you will see a welcome page. You should confirm that it is the correct product you intended to install:

After the welcome page you will be presented with the license:
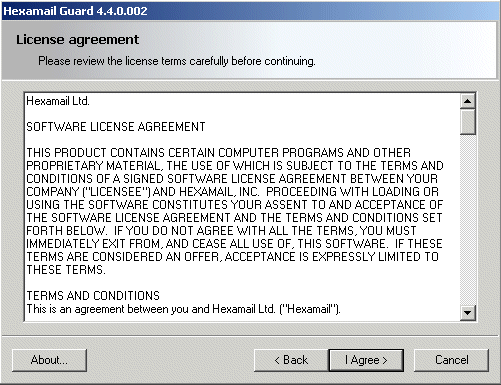
Please read this carefully and hit Yes to accept the license terms and conditions
You will then be asked where you wish to install Hexamail Nexus:
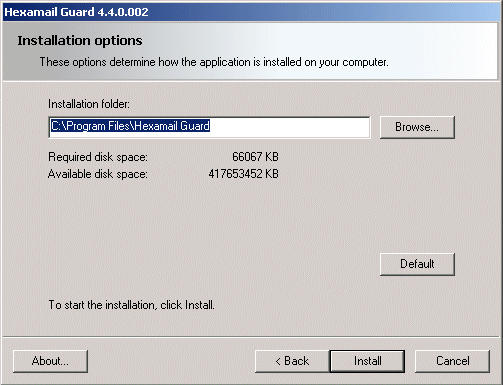
Choose a location with plenty of disk space on a fast disk drive. You need to ensure there is at least space for the installation but also room for the data that will be created by the product.
The setup program will then install the necessary files onto your computer
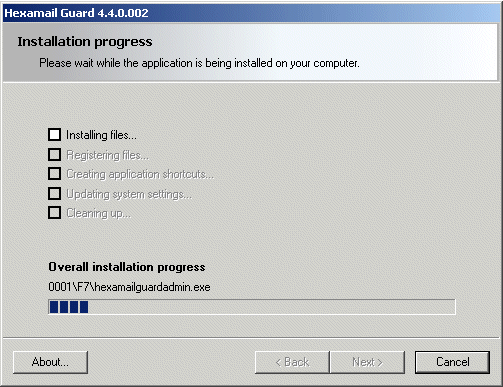
The setup process is now complete:

- 4) Configuring Hexamail Nexus for the first time
-
Once you have installer Hexamail Nexus you should see new icons in the program group folder you selected in step 3.
Launch the Hexamail Nexus interface to start the configuration process.
If you have not yet installed a license, Hexamail Nexus will ask you if you wish to look for a license file. Click yes and browse to the license file you have saved, follow the licensing instructions.
- 5) Configuring essential settings of Hexamail Nexus
-
- 6) Testing your setup
-
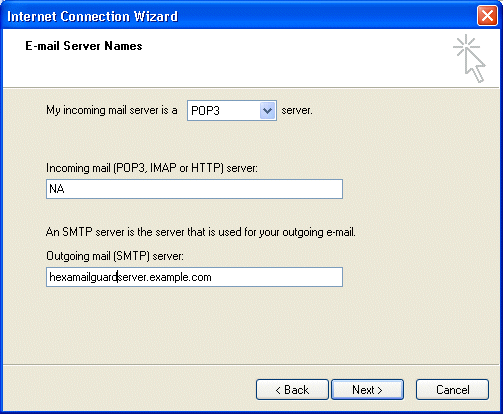
Now that you have configured the basic settings you should test your setup. You can do this by sending an email through Hexamail Nexus. Configure an email client to send emails using the server hostname and port Hexamail Nexus is running on (the smtpserver settings, as above in step (c)). We show Outlook Express here by way of example. Choose Continue on the service control panel on the Hexamail Nexus Administration. Send an email using the email client to your existing mailbox/user on your existing email server. Check that you receive the email.
- 7) Going 'Live' with Hexamail Nexus - Running on the same machine as your mail server
-
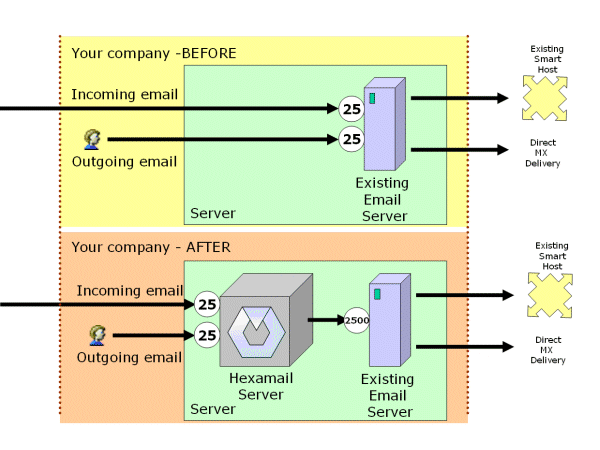
You can run Hexamail Nexus on the same physical machine or server as your email server software. To do this you need to change the port number that your email server listens on for incoming email. Details on whether and how you can do this should be found in your email server documentations. Change the email server port to an unused port other than port 25, for example 2500. Next configure Hexamail Nexus to listen on port 25 (SMTP Server settings) and relay to server 127.0.0.1 and port 2500 (SMTP Relay settings). Be sure to stop and start your email server package and then Hexamail Nexus to ensure the changes take effect. If your email server is still listening on port 25 when Hexamail Nexus attempts to you will see a line in the SMPT Server log file stating this. NOTE: during the process of switching the ports and stopping and starting your email server there will be a very short period where you cannot receive emails. It is recommended that you perform this task at a period when email traffic is low, for example first thing in the morning, last thing at night or over a weekend.
- 8) Going 'Live' with Hexamail Nexus - By changing your MX Entry
-
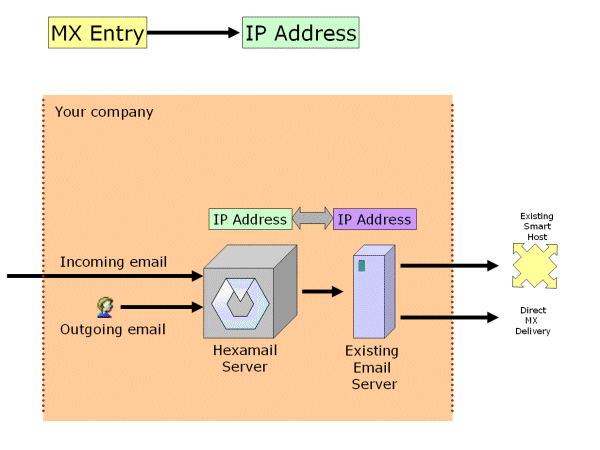
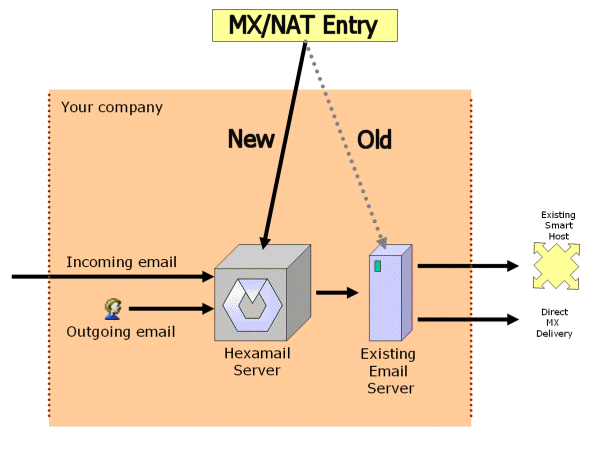
Once you are satisfied that Hexamail Nexus is functioning correctly you need to make it a live part of your email system. You can either change the MX entry used to send email to your organization to point to the server running Hexamail Nexus, or change the IP addresses of the servers. See below. The diagram below shows a schematic The best way to show it's use is probably with an example. Let's assume that you have a domain (example.com) running your own SMTP server (mail.example.com). Let's also assume you have another domain example.co.uk. Your SMTP server also handles this domain's email.
The MX record for example.com may look something like:
example.com MX preference = 0, mail exchanger = mail.example.com
mail.example.com internet address = 209.26.140.2
While the MX record for example.co.uk may look like:
example.co.uk MX preference = 0, mail exchanger = mail.example.com
mail.example.co.uk internet address = 209.26.140.2
To implement Hexamail Nexus with minimal impact you would do the following. Run Hexamail Nexus (on the same server or on a separate one) to listen on a different IP, for example on 209.26.140.4, and let's assign mail2.example.com to it.
Reconfigure the MX records as follows:
The MX record for example.com now looks something like:
;this makes Hexamail Nexus your primary mail handler
example.com MX preference = 0, mail exchanger = mail2.example.com
;you can add this to keep your existing MTA as a backup in case you stop Hexamail Nexus running
example.com MX preference = 10, mail exchanger = mail.example.com
mail.example.com internet address = 209.26.140.2
mail2.example.com internet address = 209.26.140.4
While the MX record for exapmle.co.uk will look like:
;this makes Hexamail Nexus your primary mail handler
example.co.uk MX preference = 0, mail exchanger = mail2.example.com
;you can add this to keep your existing MTA as a backup in case you stop Hexamail Nexus running
example.co.uk MX preference = 10, mail exchanger = mail.example.com
mail.example.com internet address = 209.26.140.2
mail2.example.com internet address = 209.26.140.4
Please note the comment relative to the backup MX record. While it's a good idea to add them in case with problems with Hexamail Nexus, keep in mind that some spammers will send emails to any server they find an MX record for. This means that they can send mail directly to your unprotected MTA, which will bypass Hexamail Nexus and thus deliver the spam to the intended recipient. A good tradeoff would be to leave the backup MX during your testing phases, then remove it when you are confident Hexamail Nexus does it's job. What happens after these changes? The whole world will see that your primary MX record points to the IP on which Hexamail Nexus listens on. They will send emails to that. Hexamail Nexus will then forward legitimate emails to your SMTP server at mail.example.com. Your existing customers who have mail.example.com for SMTP server in their email client configuration will still use that as their SMTP server, nothing will have changed for them. Aside for receiving barely any spam at all!
- 9) Going 'Live' with Hexamail Nexus - By switching your IP Addresses
-
You can switch the IP address of your email server and the server Hexamail Nexus are running on (remember also to change the settings in step (d) to point to the final IP address of your email server)
